
操作說明:
g - 切換格點與無格點
切換視窗 - 文字面板點選, 圖示點選

物件顯示的樣貌

右下方功能鍵

zoom : 等同於滑鼠滾輪
zoom extend : 圖形放到視窗範圍的最大
orbit: 滑鼠左鍵, 可任意轉動不同視角

右上方指令

select object : 預設選取後的object 為白色線圖
select by name : 以object name 選擇(可用中文命名)

select area
window/crossing
select and move
select and rotate: 切換不同視角對object 作旋轉

若自己轉到頭昏時, 可點選上鍵後按右鍵, 出現設定視窗, 將數值歸零

uniform scale(按右鍵可設定數值

Manager layer

除了一般定外, 還可設定是否 render

1. create --> box --> (於top view 上先隨意建立一個box ) -->
修改為正確數值 ( 39x44x5) 並更名為"底板"

2. 相同作法在 left view 上建立box, 並修改為 175x39x5 更名為 "左側板"

3. 移動左側板至相對位置,
A. 移動到相對高度
1.點選左側板 -> 2. align -> 3.點選底板 -> (出現align Selection)

 動Y軸
動Y軸
移動Y軸

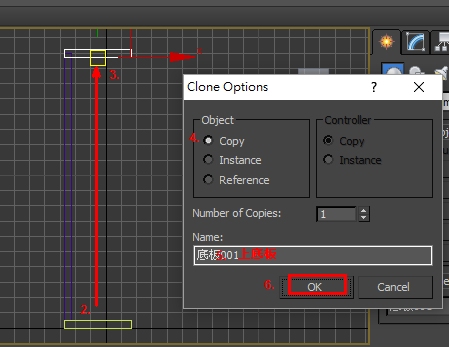
4. 複製底板到上底板
1.(Select and move) 按住 shift 2. 點選底板, 往Y方向拉動, (放開後) 3. Clone Option --> 4. copy
5. Name: 上底板 --> 6 OK
用align 調整相對位置

複製左側板到右側板,
5. 再複製一個上底板, 命名為隔板1

修改隔板1 height=1.25

6. 上底板和隔板1間距=34
A. 移動隔板1與上底板並列 (Align)

Select and Move (按右鍵出現) Move Transform

重覆複製隔板....書架完成囉!!

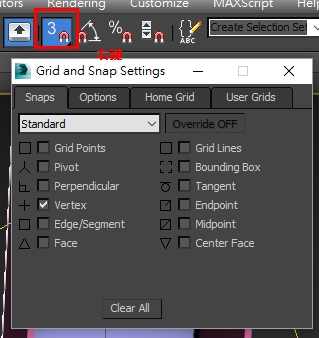
7. 鎖點功能 (開啟/關閉)
右鍵-->設定鎖點模式
 8
88. Group - 將物件群組
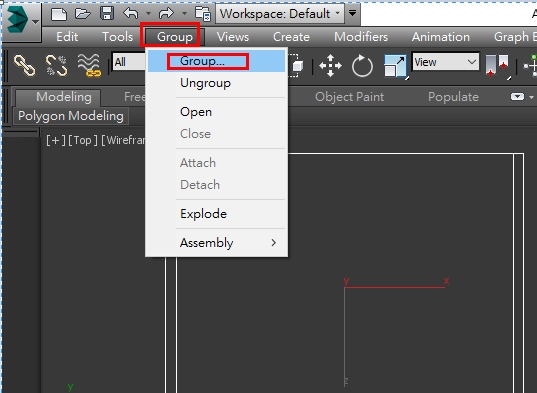
給物件名稱
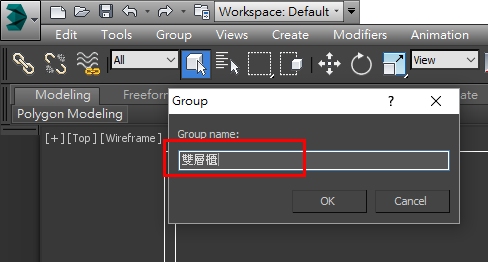
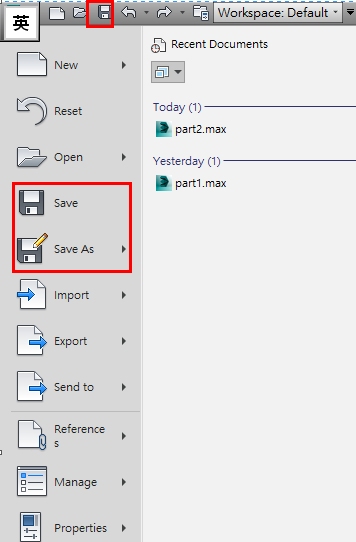
儲存檔案。
貼圖的基本指令操作
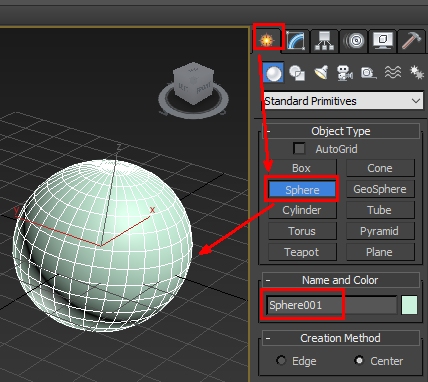
1. creat -> Sphere (任意畫圓球)

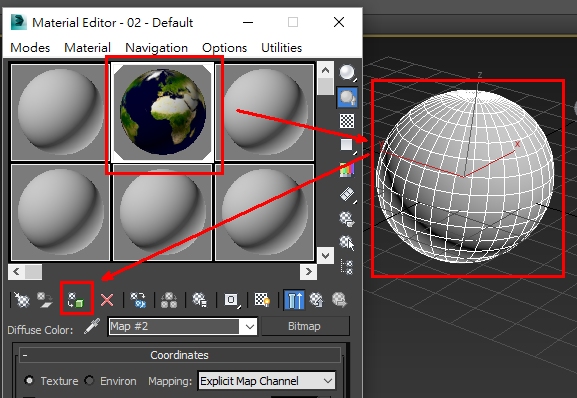
2.. Material Edit -->Modes Compact Material Editor

3. 選材質球 --> diffuse -> bitmap (選取圖片檔案)

4. Sphere001 設定材質球
選取材質球2 -> 再選取Sphere001 -> Assign material to select
5. Show shaded Material in viewport (Sphere001 可見貼圖)
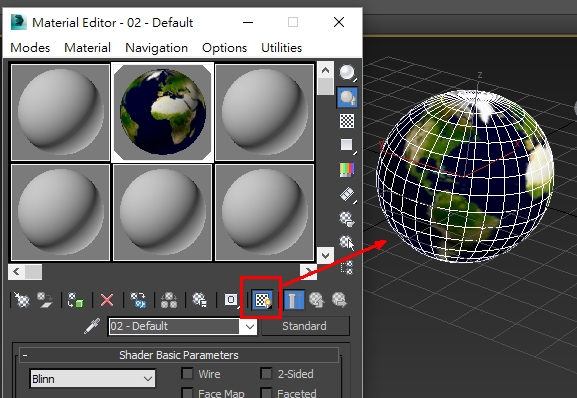
6. Render Product (預視成品效果)
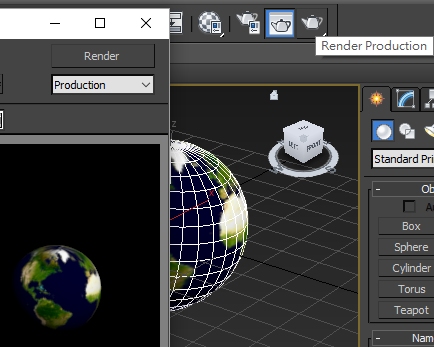
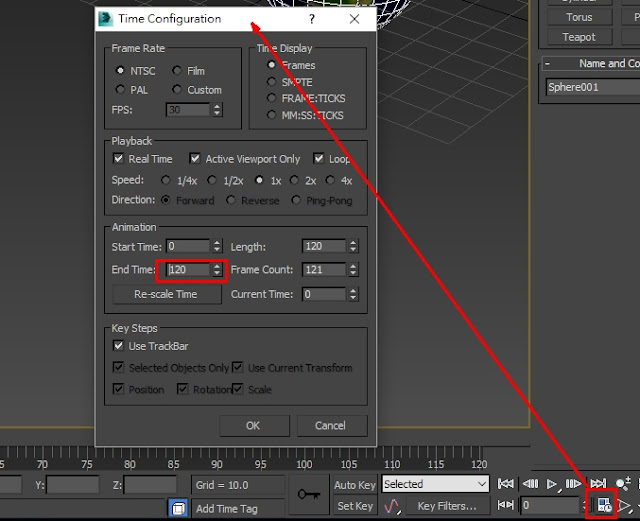
製作地球自轉動畫
1. Time Configuration -> End time 120 (執行 4sec 影片)
2. 時間軸拉到 120 位置 -> (按下) Autokey -> Select and Rotate
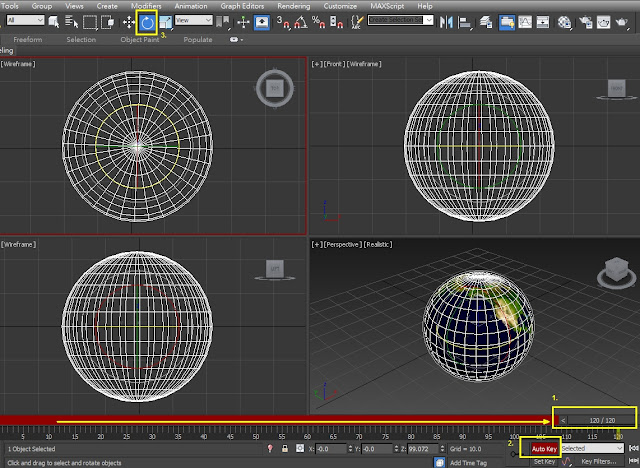
3. 完成後, 可見在時間軸 0和120 處, 產生關鍵影格符號
4. 關閉 autokey 後, 按下 play animation , 即可預視, 剛才設定的旋轉動畫
5. 輸出
Render Setup -> Active time -> output size
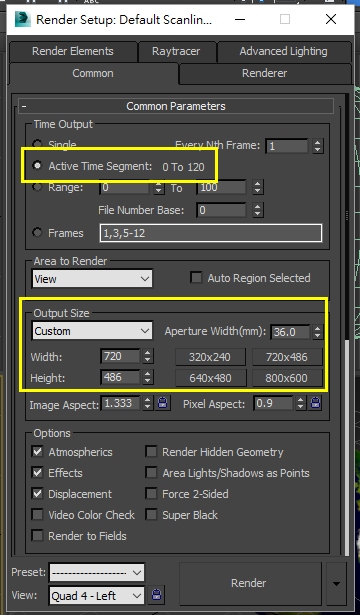
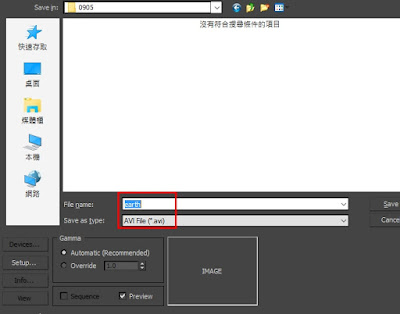
output file
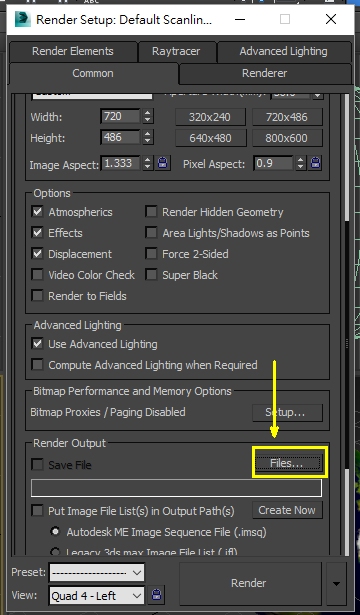
檔案格式, 檔名
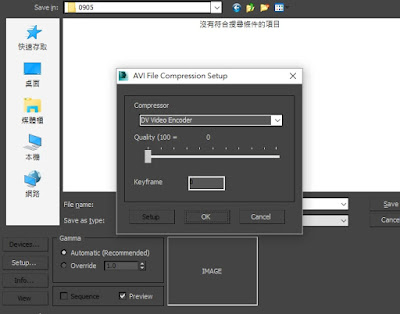
壓縮設定
確認 Render 視窗後 -> Render
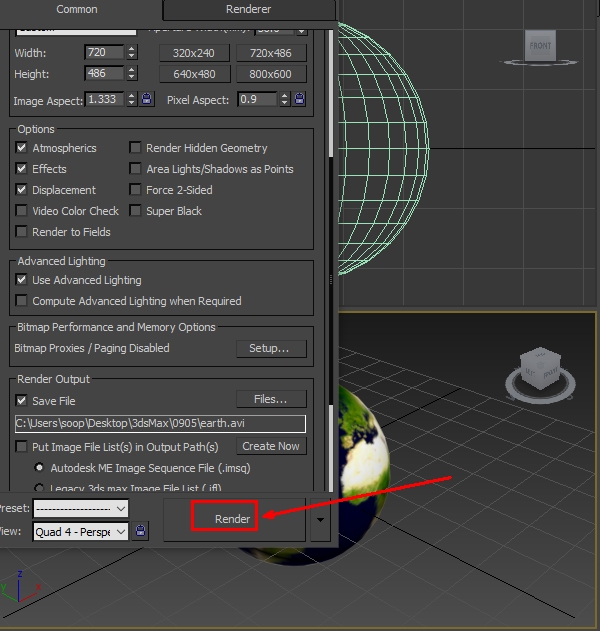
即可完成 avi 檔案了
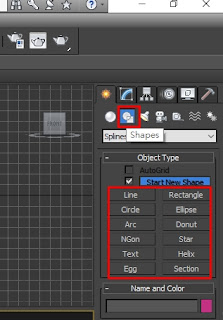
3dMax也是可畫2d 線段的, 但2d 圖形是不能render
Create -> Shapes (line, Circle, Arc, Rectangle...)
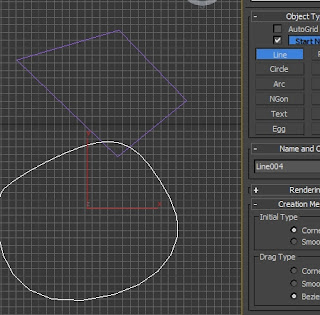
滑鼠左鍵單點, 可畫直線, 靠近起點時, 會出現是否 close 的訊息

繪製時, 左鍵若拖拉, 可繪製 Spline
line 有三個元件 Vertex (頂點) Segment (線段)
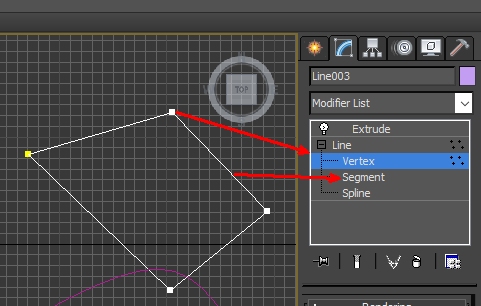
Select and Move -> Vertex (點選) 移動頂點
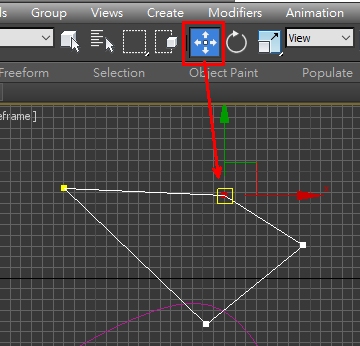
(選取) Vertex -> (右鍵) Bezier Corner (移動單邊把手)
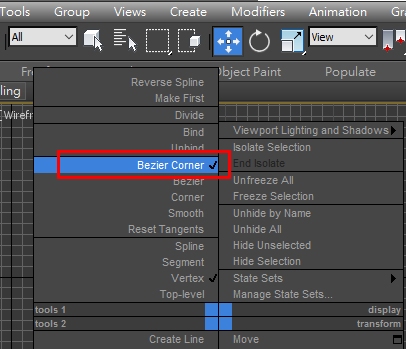
Bezier -> 雙邊把手連動
corner - Vextex 變為直線角度
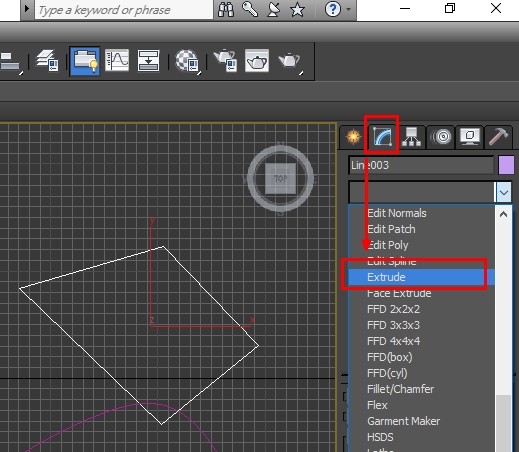
2D 轉成立體
Modify -> Extrude (立體化,為二維物體賦予三維外觀,添加厚度和透視效果。)

繪圓 Circle
Create -> Circle
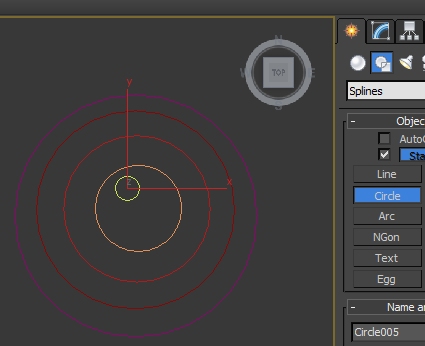
Circle 無法直接編輯
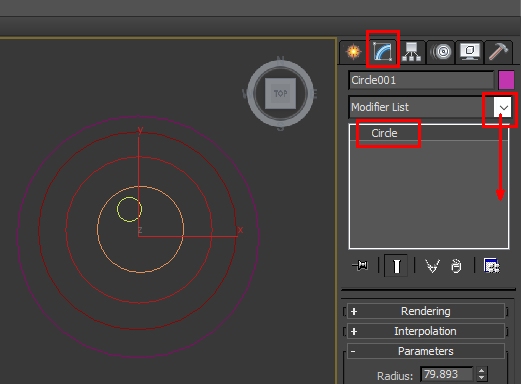
(選取 Edit Spline)
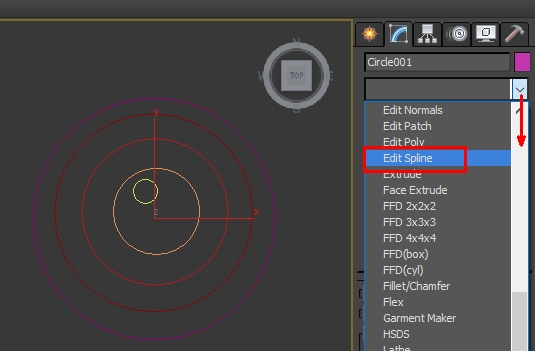
Edit Spline 還是有 Vertex, segment, Spline 三部份
Vertex -> select and move 移動頂點
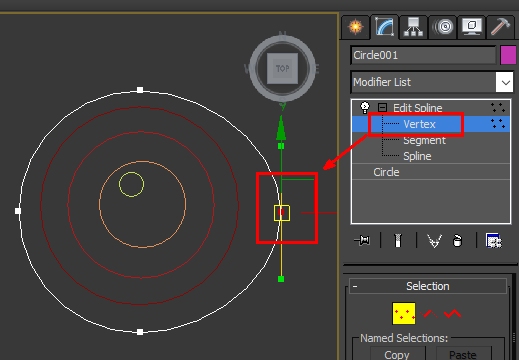
attach -> 選取所有圓 (可將所有圓連結在一起成為一物件)
select and move 會一起移
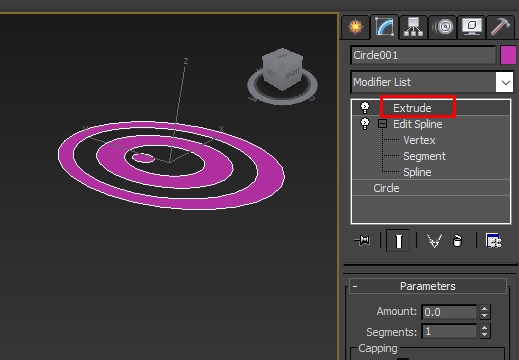
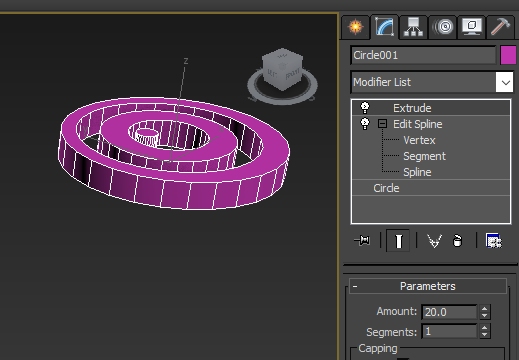
Extrude (設定 amount 長出高度)
Rectangle (三個) -> Edit Spline -> Extrue

練習蘋果logo
1. Front view


沒有留言:
張貼留言